

IMPORTANT! This activity is a SUPPLEMENT to your lesson on the Unit Circle. Your students must know how to create it using Special Right Triangles. This activity is meant to create a recall point for your students. Meaning, something exciting to remember the lesson by and its importance. So when they hear the terms Unit Circle they think back and go “Oh Yeah! That is the day we did the hand trick.”
With that said this unit circle activity is also good as a last resort for those students who just cannot grasp the creation of the unit circle. What I have noticed my advanced students love it too because once they have learned this little trick they can quickly use it to recall the piece of the circle they need. These students can also very quickly figure it out using the special right triangles or by memorizing the first quadrant. For me I just like it as an activity that the students can remember the lesson by. It is out of the ordinary and a change of pace from normal math activities.
With that said. Here is the lesson…
Unit Circle Hand Trick
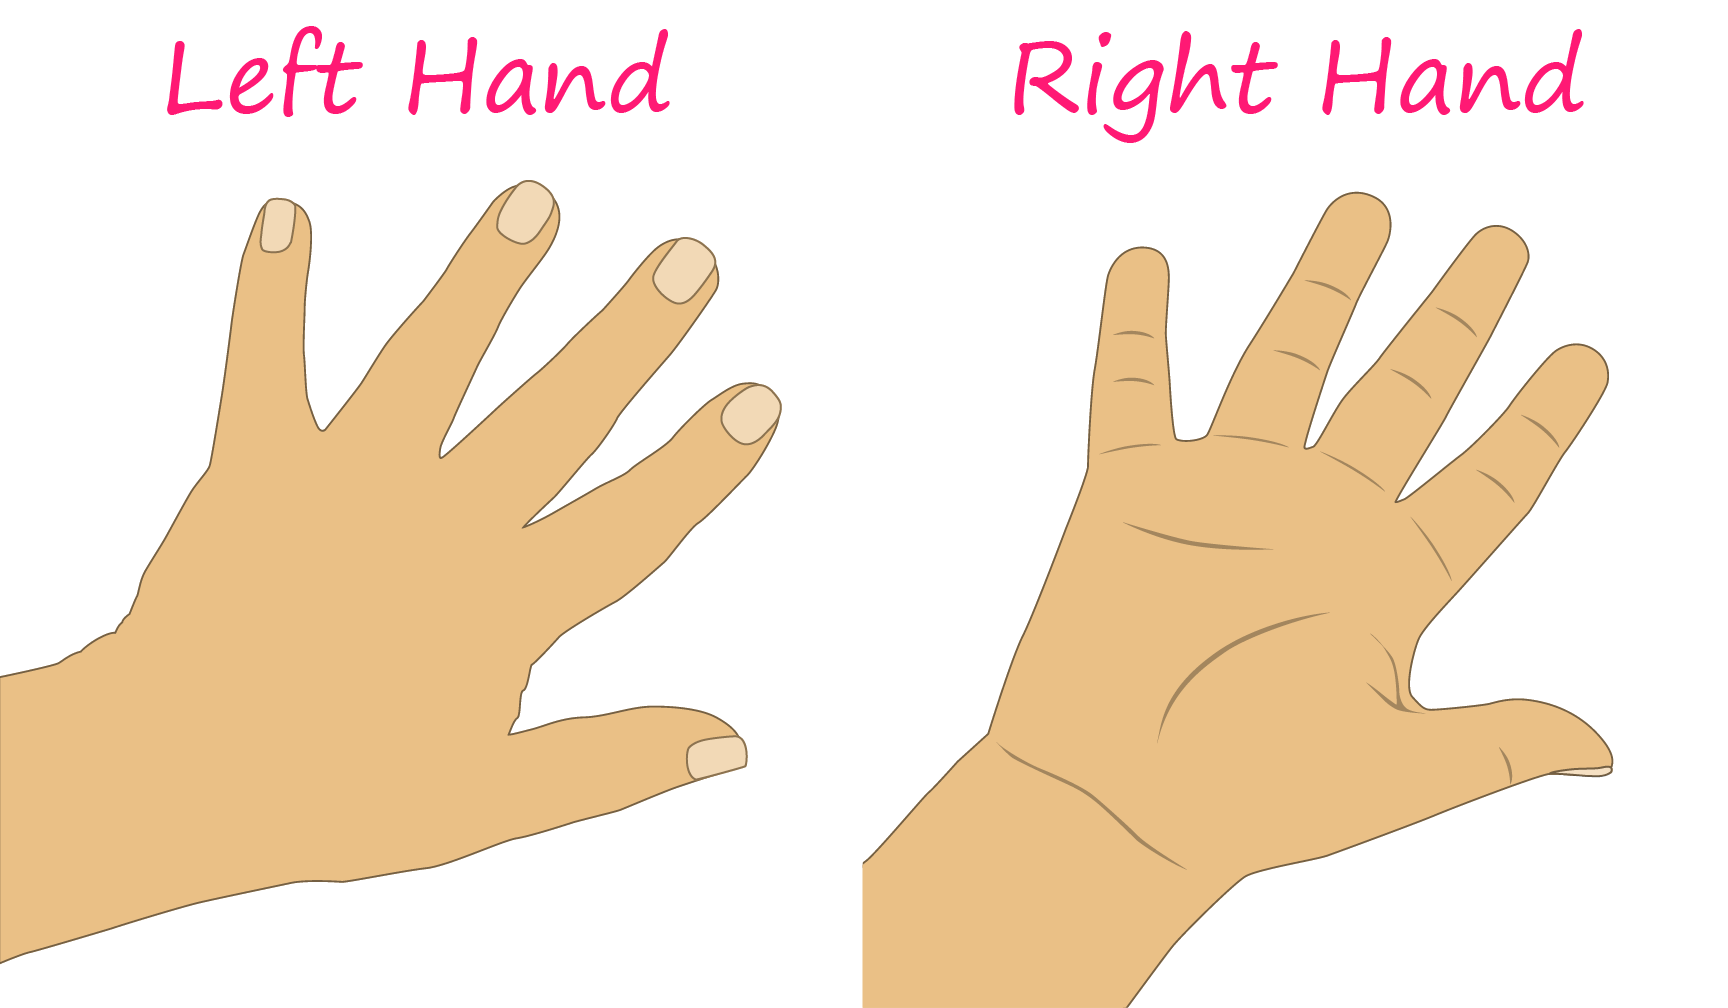
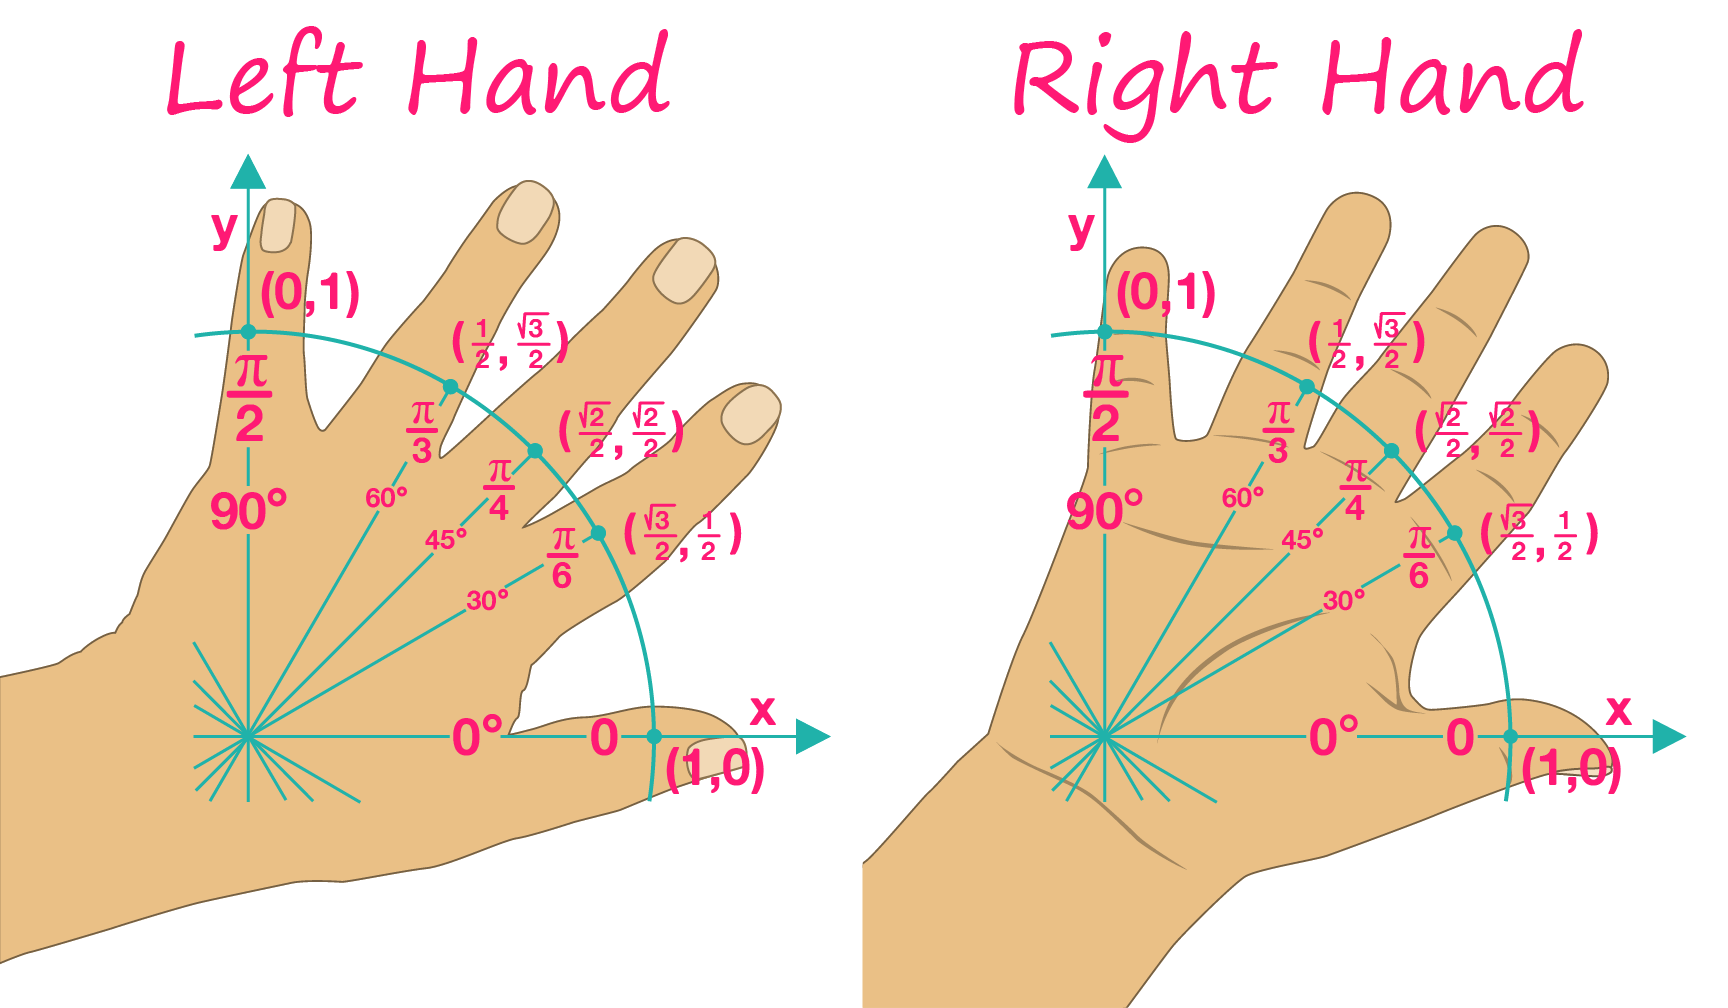
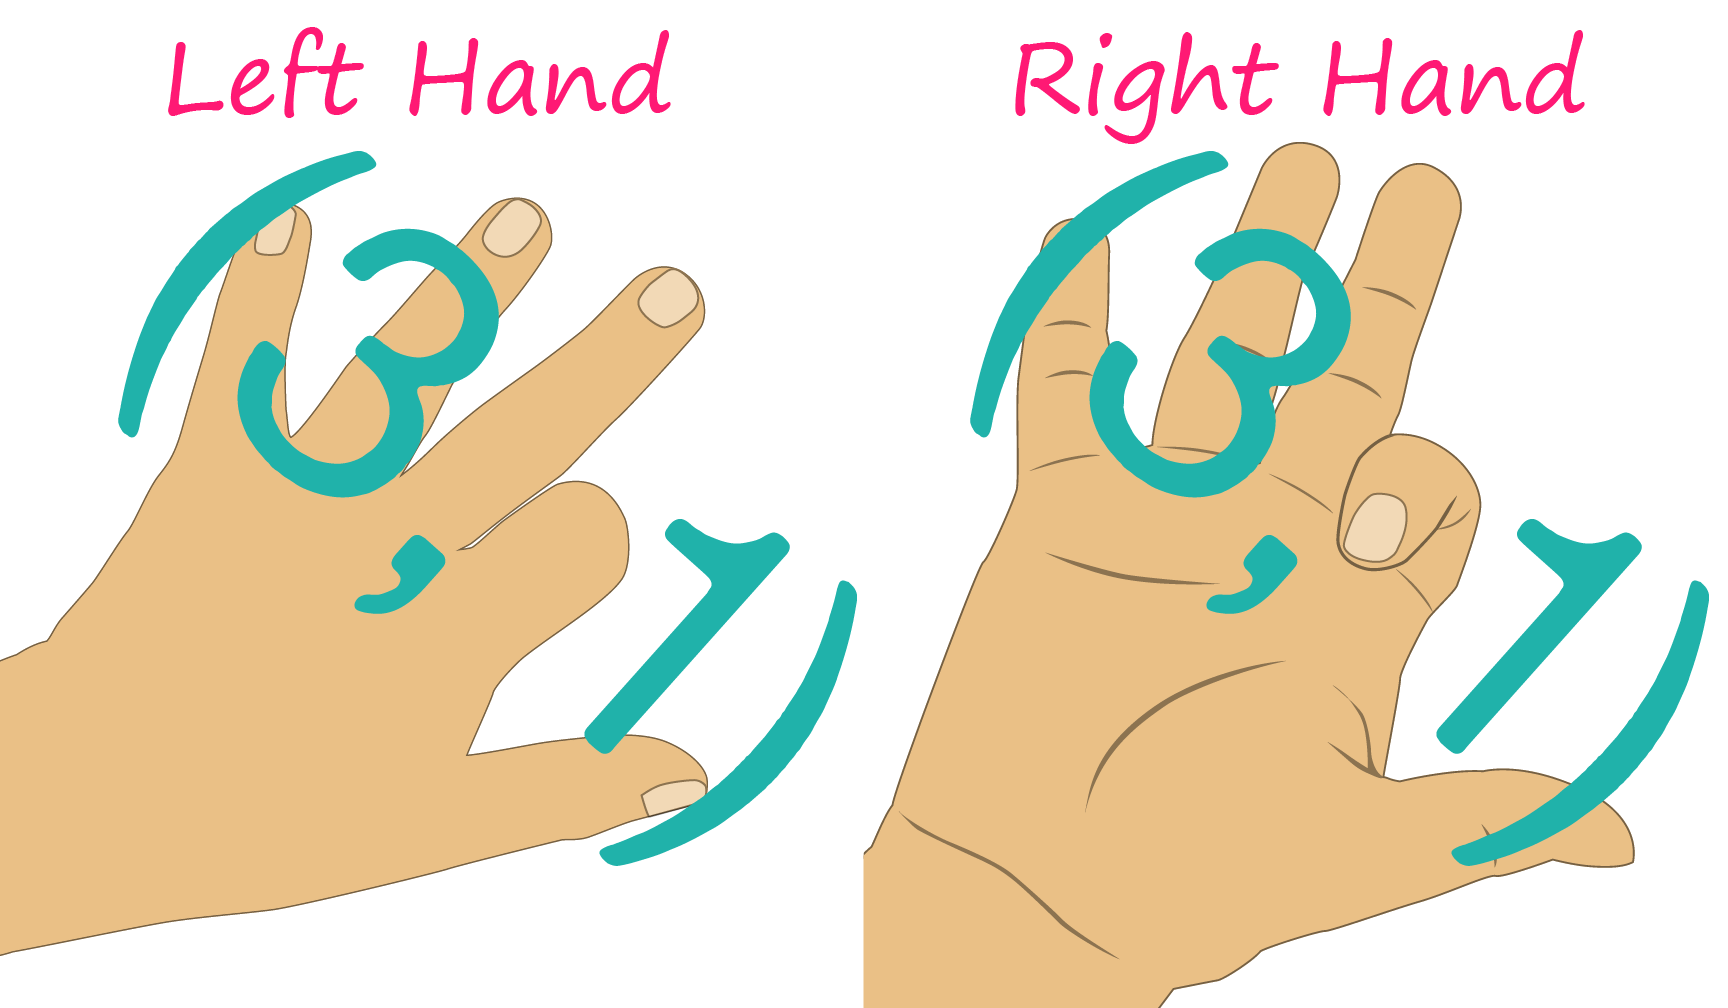
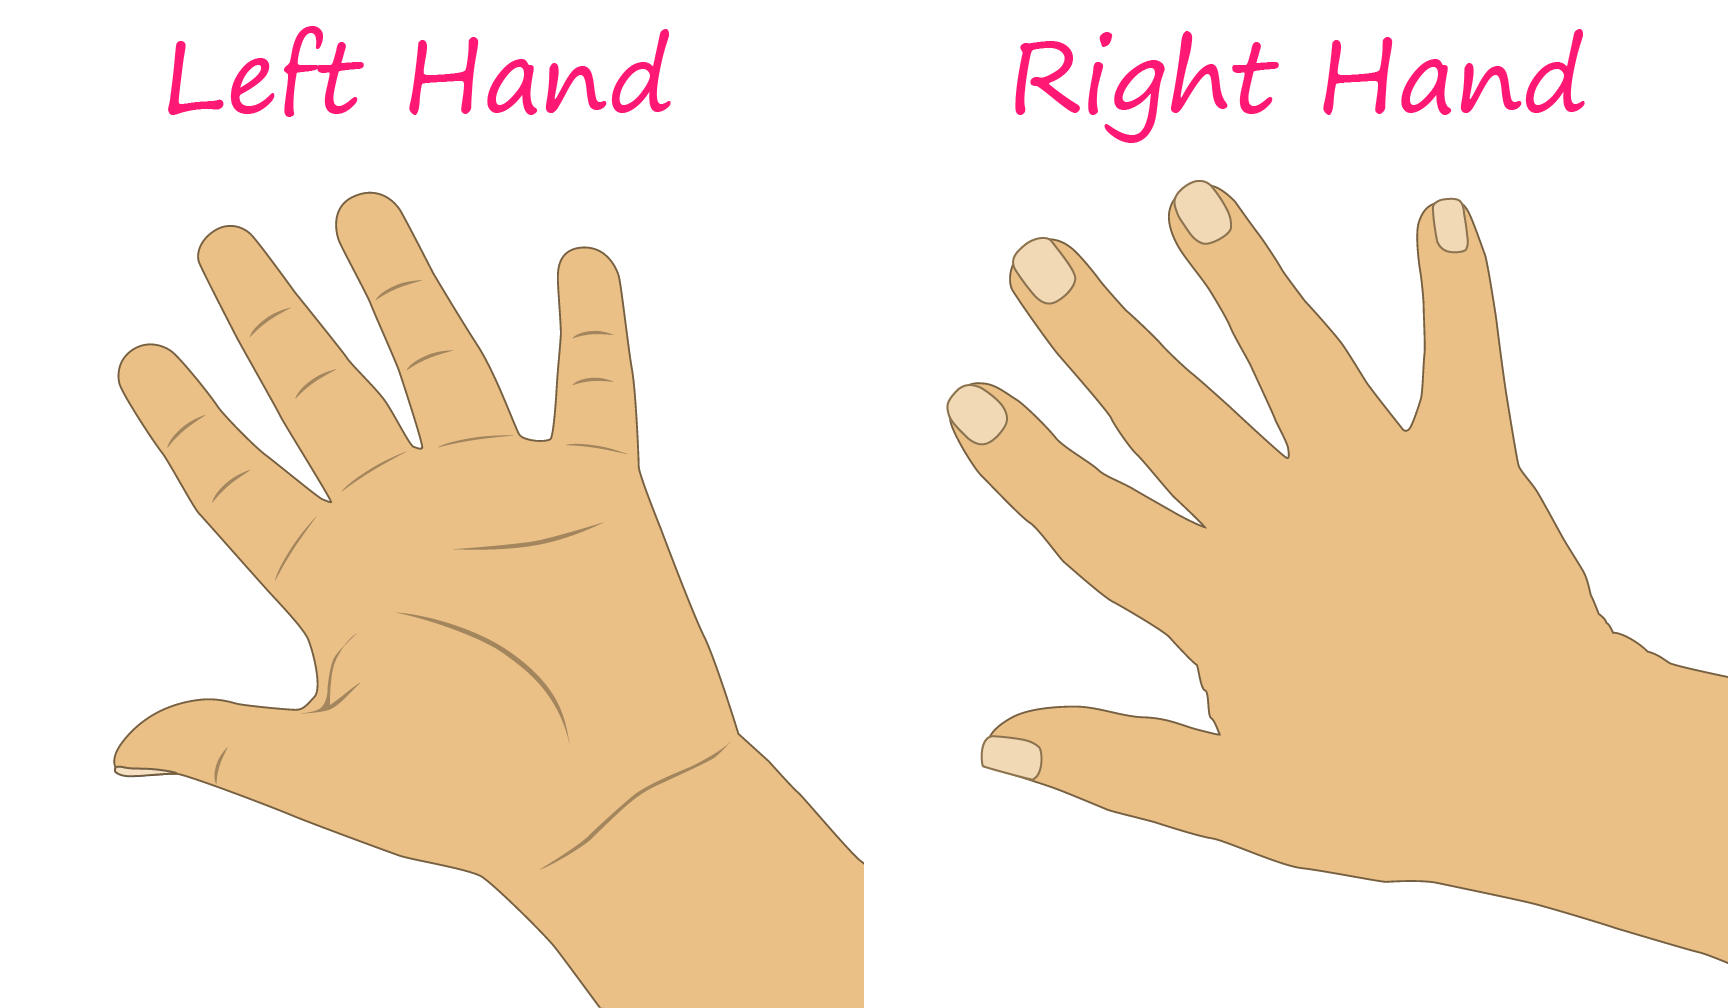
You will want your students to use the hand opposite the one that they write with. If they write with their right hand use their left, if they write with their left hand then use their right. The reason for this is so they can write while looking at their other hand to remember the ‘trick’. The below pictures shows how to hold your hands.
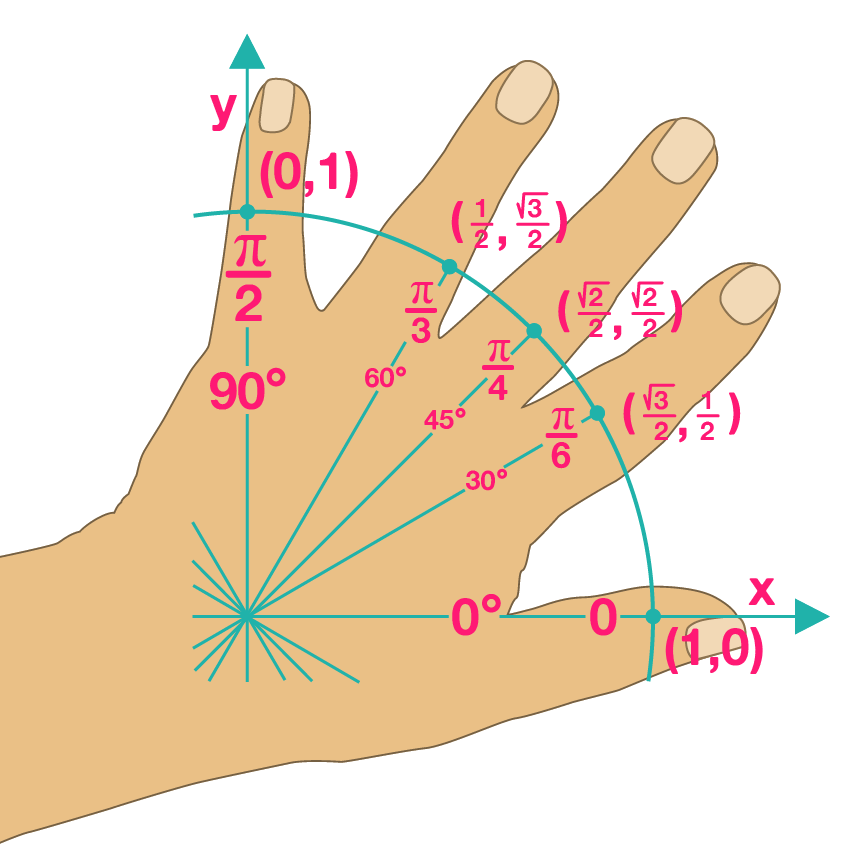
Each one of your five fingers represents a special point on the Unit Circle:
Thumb – 0° or 0π (2π)
Index Finger – 30° or π/6
Middle Finger – 45° or π/4
Ring Finger – 60° or π/3
Pinky Finger – 90° or π/2
Finding Sine and Cosine: First Quadrant
When finding sine and cosine remember your answer always looks like the square root of something over two (√?/2).
Step One:
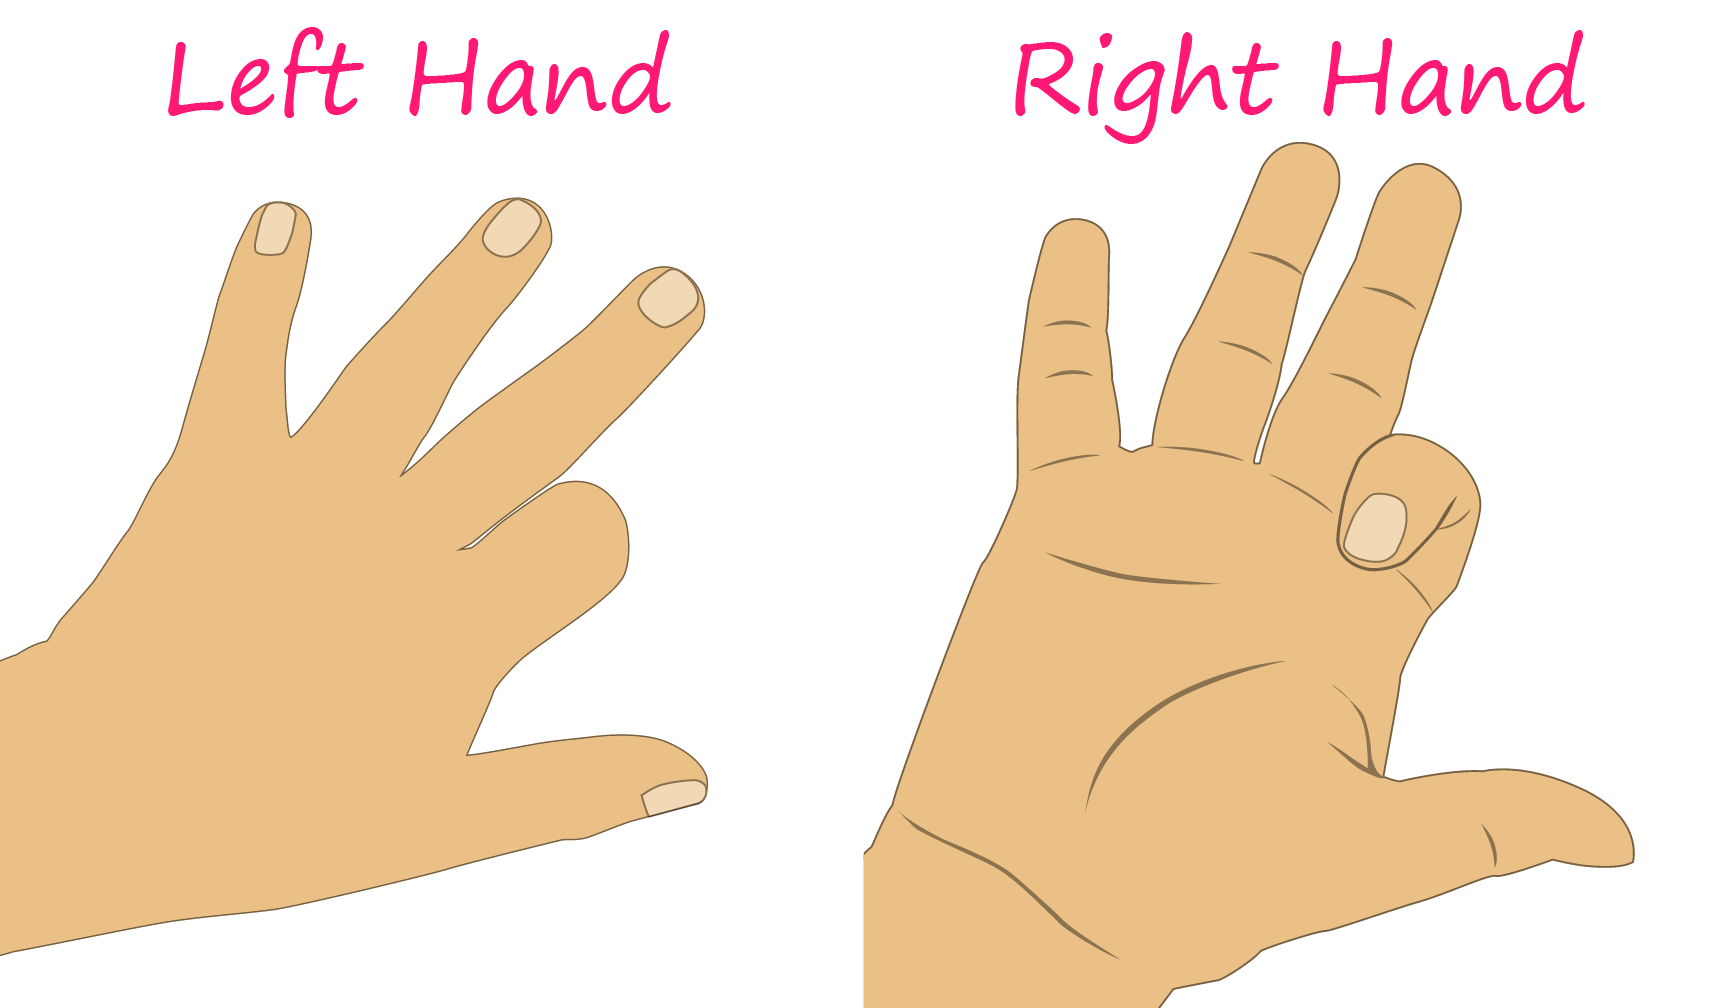
To find the value for sine/cosine just fold down the respective finger. For example, if we wanted to find sine/cosine values for 30° or π/6 we would fold down the index finger.
Step Two:
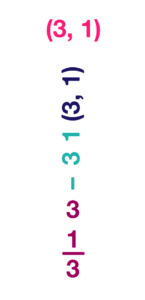
Now we turn our hands into an ordered pair; parentheses on the outside and a comma where the folded down finger is.
So continuing with our example of 30° or π/6 we get (3,1).
Step Three:
We must now implement what was stated before step one (√?/2), which gives us (√3/2, √1/). This simplifies to (√3/2, 1/2).
Step Four:
Since we know on the unit circle, the ordered pairs are presented (cosine, sine) we can conclude that the sin(30°) or sin(π/6) is equal to 1/2 and the cos(30°) or cos(π/6) is equal to √3/2.
Note: This does work for 0° and 90°. 0/2=0 and √4/2=2/2=1.
Finding Sine and Cosine: Second Quadrant
This is almost as easy as the process for Quadrant I, but with a few small changes. First things, first, we need to flip our hands (just like a reflection over the y-axis). Now each finger represents a new point on the unit circle:
Pinky Finger: 90° or π/2
Ring Finger: 120° or 2π/3
Middle Finger: 135° or 3π/4
Index Finger: 150° or 5π/6
Thumb: 180° or π
Now we follow steps one through three for Finding Sine and Cosine: First Quadrant.
For example, if we were trying to find the sine/cosine values of 120° or 2π/3 we would get (√3/2, 1/2).
Step Four:
Since we flipped our hands over the y-axis, we now must switch our values in our ordered pair.
Thus we now have (1/2, √3/2).
Step Five:
Finally we must apply negative signs where appropriate for the second quadrant (the x-value of the order pair).
Therefore we end up with (-1/2, √3/2) and can conclude that sin(120°) or sin(2π/3) is equal to -1/2 and cos(120°) or cos(2π/3) is equal to √3/2.
Finding Sine and Cosine: Third Quadrant
This is exactly the same as Finding Sine and Cosine: Second Quadrant, except for step five, we now negate both value of the ordered pair. (You also have to reflective your hand again, this time over the x-axis. Or starting from the original position, rotate 180° counter clockwise. This is an awkward position for the right handed people. Fingers will also now represent new positions on the unit circle.)
Finding Sine and Cosine: Fourth Quadrant
Starting from the original position, flip your hand down (reflect over the x-axis). Fingers will also now represent new positions on the unit circle. (This is an awkward position for the left handed people)
Follow steps one through three for Finding Sine and Cosine: First Quadrant.
Step Four:
Apply negative signs where appropriate for the fourth quadrant (the y-value of the order pair).
Finding Tangent:
Follow step one and two for Finding Sine and Cosine: First Quadrant. Going back to our example of 30° or π/6 we get (3,1).
Step Three:
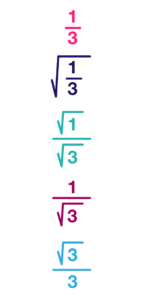
Rotate your ordered pair 90° counter clockwise and turn into a fraction.
Step Four:
Place fraction under radical sign and simplify.
Step Five:
If you use this in your classroom, please leave a comment below; I am curious as to how your students will react.
This is a blog post I came across on Pinterest. I wanted to share it with everyone! Absolutely amazing idea! I tried to reach out to Ms. Smith, the creator of the lesson, to interview her but there doesn’t seem to be a contact form on her page. If anyone knows how to get a hold of her please let us know. Amazing Idea! Her blog post can be found at http://highschoolmathadventures.blogspot.com/2013/08/Unit-Circle-Hand-Trick.html
If you are looking for more amazing Geometry Lessons be sure to subscribe to our email list. We will also send you all of our worksheets, tests, quizzes, lesson plans, videos, slide shows, and everything else you would need to teach the first Unit of Geometry absolutely FREE! Simply Click Here or the image below.

Don't Forget to Pin this Lesson on the Unit Circle Hand Trick!
